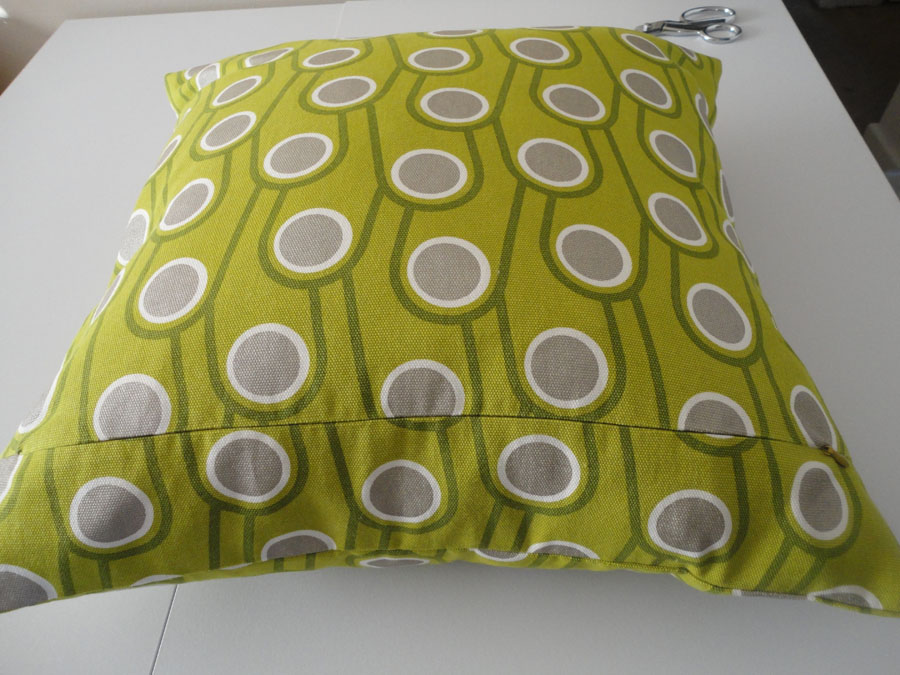
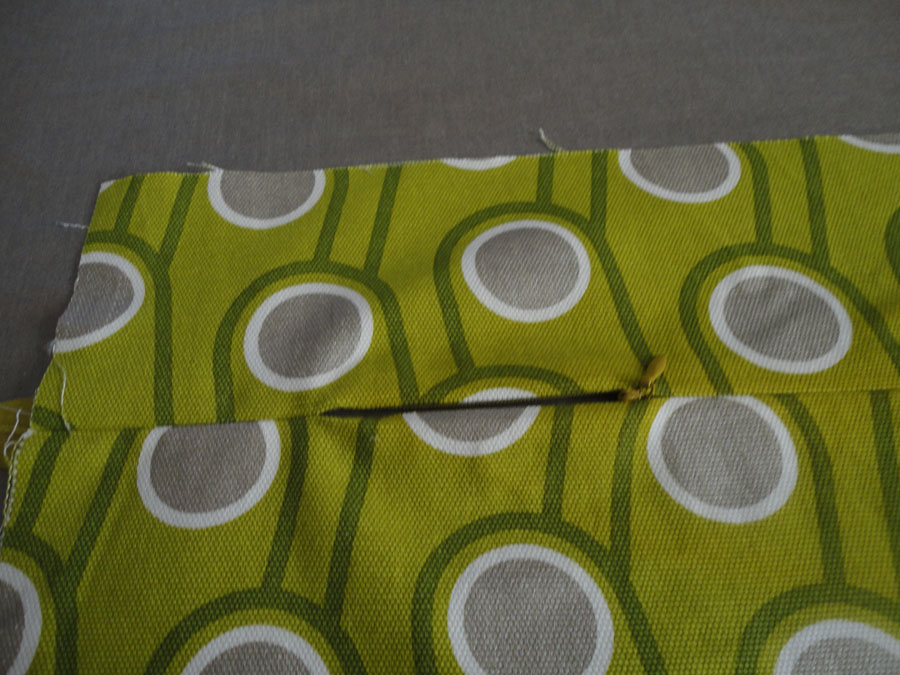
This will be a very image heavy post. On tap for today, a visual guide to sewing your own pillow cushions with an invisible zipper enclosure. I will show you how I drafted a simple pattern, sewn on an invisible zipper, and turned sharp corners using an industrial technique I recently learned.
There will be two styles:
Pillow one has the zipper on the back side and inset a few inches from the top.
Pillow two has the zipper sewn on the side.
Here is a list of sewing notions you may want to have ready:
The usual sewing necessities:
- Fabric for your cushions, the amount you'll need will be dependent on the size of your cushions, and how many you plan to make. I used a 100% cotton canvas from a
Dong Dae Mun vendor (2nd floor of building A, I think I have specific stall info if someone is really interested)
- Thread to match your fabric
- Scissors or rotary cutter
- Pins
- Ruler
- Fabric marking tool
- Sewing machine
- Zipper foot for your sewing machine
- Invisible zipper to span the entire width of your pillow
- An iron and ironing board
- Paper to make a pattern template if you desire to make one
Items that aren't essential but made my life easier:
- Serger/overlock machine for cleaning up your raw edges
- Invisible zipper foot for your sewing machine
- Pattern weights
--------------------------------------------
PILLOW TEMPLATE FOR INSET INVISIBLE ZIPPER
My pillow forms are 22" x 22". I drafted my template to result in a finished cushion that measures 20" x 20". I gave myself 1/2" seam allowances all around.
You will have three pattern pieces for the inset style case:
- Front
- Back
- Back inset
The cushion front will be your largest piece, it will be your desired finished size plus seam allowances on all four sides. My piece was 21" x 21".
The back inset's height will depend on how high or low you want your zipper to sit. I modeled my distance after a retail pillow, sitting 3 inches down from the top. My back inset measured 4" x 21", 4" because I still need seam allowances for all four sides including the zipper seam.
The back piece height dimension will be: (height of your front piece minus the height of your inset) plus seam allowances. In my case, (21" - 4") + (1" total seam allowance) = 18". The width will be the same as your front piece. My back was 18" x 21".
If your cushion is not a perfect square, you'll have to play around with the numbers. Here's a visual to break down of how the pieces come together.
To save paper I just marked the cushion back piece dimensions on the cushion front piece and simply folded it over when it was time to cut.
--------------------------------------------
(I didn't take enough pictures during the construction stages of the green pillow so some of these steps will feature the other fabric. Instructions for both pillow styles are 95% the same)
CUTTING OUT YOUR FABRIC
I chose to lay out my pattern with the grain going vertically (up/down) along my pillow case. The way I wanted my fabric design dictated this layout. I don't think it's really important for you to pay attention to grain lines with pillow cases as long as you're consistent.
I love using pattern weights when I am cutting out fabric.
SEWING YOUR CUSHIONS
If you are choosing to serge your raw edges you will want to serge the bottom edge of your back inset piece, and the top edge of the back piece.
With right sides facing each other, mark how long you want a closed seam. There will be two closed seams, one on each side of your cushion. I marked mine 3" from the raw edge, giving me a 2.5" closed seam.
Sew to the marking, be sure to remember to make a couple of back stitches to secure the seam.
Open your seam and iron the seam allowance. This step is not a complete necessity but I found pre-setting my seams really helped keep things crisp and easy to see as the sewing process continued.
SEWING THE INVISIBLE ZIPPER
Prepare the invisible zipper by ironing the coils open. In the first picture the point of my iron isn't placed properly to show you how the coils need to be prepped. The point of your iron should be used to gently pry the coil flat.
Place your zipper on the seam allowance, slider down on the fabric and zipper pulled open. Line one edge of the zipper flush with the fabric. It doesn't matter which end you use, the important thing here is to have a zipper that's the same length or longer than the width of your cushion. If you need it, pin the top of the zipper to hold it still.
When you start to sew the zipper down, make sure you are only sewing on the seam allowance, fold the inset or back piece to the other side. You will want to start sewing the zipper higher than where you stopped the closed seam. For a less bulkier side seam, I chose to leave the first inch of the top and bottom of the zipper free, so I started sewing about an inch in from the side seam (stop the same distance on the other end).
Having an invisible zipper foot really helps the needle get right near the coils. You can sew invisible zippers with a regular zipper foot too, this is where ironing the coils flat will help getting the foot close to the edge of the coil. Proprietary plastic zipper feet are sold at places like JoAnn and Hancock Fabrics, I prefer the ones made by YKK over Coats and Clark. Or, check out Ebay and other online sources for metal invisible zipper feet that will fit your machine.
Use your hands to guide the zipper tape to match the sides of your raw (or serged) edge. After sewing many zippers I don't usually use pins or tape anymore, you do what you need to make this all work.
When you are done with the first side of the zipper, zip up the tape completely. On each end of your zipper, marks where each side of zipper tape will align with each other. This is done to avoid making any bumps in the fabric when zippers aren't matched up properly. Doing this step really helps me avoid using pins to hold my zipper tape to the fabric. As long as I make sure the lines are in the same place on both ends as I sew, I know the zipper is going to be lined up perfectly when I'm done.
Open the zipper tape up and sew in the same direction as you did with the first side. Make sure you begin and end the same distance from your raw edges as before, and the markings from the previous step are all aligned. Use your hands to guide the edge of the zipper tape with the edge of your seam allowance on side two. Don't forget to fold your back inset or back piece to the other side so you are only sewing the tape to one layer (the seam allowance)
Once both sides are sewn in, take your piece and iron the right side of the fabric. You will want to open the zipper up to make sure there is room to turn the cushion inside out when the other three seams are sewn together. Not leaving the zipper open will make it trickier to open later. Be gentle when you have to maneuver the zipper tab past the couple inches of closed seams, if you're too forceful it may break open the stitches. You can see how the closed seams now act as a stopper for the zipper on both sides.
Cut the zipper tape if it's longer than the pillow. This is where stopping the sewing line an inch from the side is helpful. You can cut your zipper tape right at the stitching line for the side seams so it won't get sewn down.
FINISHING STEPS
Take your completed back piece and line it right sides together with the front piece.
Sew up the remaining three sides. Instead of pivoting at the corner, sew all the way to the edge (don't forget to backstitch).
I find it helpful to iron open each seam right after I sew them. I like having neat and crisp edges when I iron the cushion sides after it's all turned inside out. You can skip this part if you want, I'm neurotic.
After you sew the sides you can follow up with a serger. You could also skip the sewing part and just serge straight off the bat to close the seams.
TURNING SHARP CORNERS
I have been looking for methods on turning sharp corners for the longest time. I have used numerous techniques with a success rate of less than 25% in achieving the kind of pointy corners you see in ready to wear collars.
Recently I saw a tip in Threads magazine from Peggy Sagers on the industry technique for turning corners. I followed the simple rules on this heavier weight fabric and I was so happy with the results. I am now in the 85% success bracket, with more practice I am sure I can hit over 90%. This might be hard to describe using simply pictures and words but I will try my best. I tried taking a video of the process but I had no one else to hold the camera- it didn't turn out too well.
I chose to iron after each folding process because my fabric is pretty thick. You can play around with ironing or not ironing. Like I said, I'm crazy about having tidy corners and seams.
Fold the corner up so the intersection of the two stitched side seams meet at the bottom center of the triangle.
Fold one side seam on the stitching line and iron (it doesn't matter which side you do first). Repeat on the other side.
When the side seams are folded and held down, we will essentially have a mitered corner. Reach through the zipper opening into the cushion and stick your index finger or thumb (depending on which hand you use to do the turning) as close into the corner as you can. Use your thumb (index finger) to hold down the folds on the outside.
In the above picture I used my left hand to turn the corners, in the next photo I did the step with my right hand. See what I mean when I warned you I took pictures during construction of multiple pillows?
We are continuing the visual instructions using my right hand to turn the corners (as seen above). The rest of the cushion fabric will be gathered between the c-shape you'll be making with your thumb and index finger.
Start to turn the corner to the outside while you still hold down the folded corner.
You can the point on its way out....
Here is the fully turned out corner!
This particular corner isn't fully straight just yet but I hit it with an iron and a little shuffling around of fabric and it ended up looking pretty nicely.
Do this for the remaining three corners and you're ready to stuff your pillow form into the cushion.
Zip the suckers up and you've got yourself a very professional looking cushion cover.
--------------------------------------------
INSTRUCTIONS FOR A CUSHION WITH A SIDE INVISIBLE ZIPPER
Cut two uniform pieces of fabric that includes seam allowances for all four sides. Insert the zipper using the method I detailed above to one side of each fabric piece. Sew up the remaining three side seams and turn the corners in the same manner. Stuff your pillow case into your finished masterpiece.
Who needs to pay beaucoups bucks for customized pillow cushions? This is a fun and fast project with beautiful results.
I hope my tutorial has been helpful! I have been helped by many online photo tutorials over the years and I'm happy to finally be able to give back!
The final parting shot... I added some decorations to my straight stitch machine the other day.