Well, this year has come and almost gone. I entered a contest over at Pattern Review that took much of my time from late October through early December (the PR Sewing Bee.) I was fortunate to make it to the final round and it was an absolutely exhilarating (if not exhausting) sewing experience.
I am almost done with a bodice sloper for my husband, his pants sloper needs some minor tweaks to fix grain issues before I can finally digitize the pattern into Cameo (from Wild Ginger.)
In the mean time I am planning a new wardrobe capsule based on some tips found on the Vivienne Files blog. I haven't figured out what the color palette will be yet, trying to sift through my stash to see how much I can pull together without adding more fabric to the collection.
My fabric fast for 2014 resulted in a 75% decrease in spending compared to 2013. If I can manage to sew at half the rate that I found myself doing for the PR Sewing Bee, I might be in really good shape before our move in 2015!
I hope all of you enjoy the remaining few days of this year. I plan to be a bit better about updating on here in the next few weeks- my sewing groove was given a great jump start back to life because of the Sewing Bee and I have a few things to share.
Friday, December 26, 2014
Wednesday, December 4, 2013
From 2D to 3D
My sister joined me for a few days last week for Thanksgiving. The weather was quite awful in the area before turkey day (it was just the two of us this year so we actually made a Peruvian chicken) but I took the forced indoor time to draft a bodice and skirt sloper for J.
I then transferred the drafted pattern onto muslin, added 2" seam allowances and then pin-fit the pieces to her body. I don't think my bodice draft was too far off of her actual body shape, but my draft for her sleeve and skirt were too long.
I had the hardest time pinning the sleeves onto the bodice. In class last night we started fitting sleeves. I also had my bodice fitted last night, and apparently I did not do as great of a drafting job as I did for my sister's pattern. I barely had enough fabric in a couple of areas and will need to make some adjustments before my sleeve is fit next week.
Unfortunately my sister is now back in Illinois and I can't do any more physical tweaking of the sloper on her body. Overall I think I did a decent job given my lack of experience in pin fitting- I've only watched it being done up until last week.
Here's J all muslined up. I worked on pin fitting her left side. I still see some issues with the bust, neckline, back sleeve/bodice, and center front (although I think this problem was due to poor pinning for the picture), all of which I'll have to judiciously adjust on the flat pattern. Maybe next time she's in town I'll make a duct tape dummy. She'll just *love* that...
It was really satisfying taking a flat pattern and adjusting it on a live body. I wish I had a custom dress form to be able to do that for myself.
The next step is transferring the adjustments back onto a master paper pattern.
I then transferred the drafted pattern onto muslin, added 2" seam allowances and then pin-fit the pieces to her body. I don't think my bodice draft was too far off of her actual body shape, but my draft for her sleeve and skirt were too long.
I had the hardest time pinning the sleeves onto the bodice. In class last night we started fitting sleeves. I also had my bodice fitted last night, and apparently I did not do as great of a drafting job as I did for my sister's pattern. I barely had enough fabric in a couple of areas and will need to make some adjustments before my sleeve is fit next week.
Unfortunately my sister is now back in Illinois and I can't do any more physical tweaking of the sloper on her body. Overall I think I did a decent job given my lack of experience in pin fitting- I've only watched it being done up until last week.
Here's J all muslined up. I worked on pin fitting her left side. I still see some issues with the bust, neckline, back sleeve/bodice, and center front (although I think this problem was due to poor pinning for the picture), all of which I'll have to judiciously adjust on the flat pattern. Maybe next time she's in town I'll make a duct tape dummy. She'll just *love* that...
It was really satisfying taking a flat pattern and adjusting it on a live body. I wish I had a custom dress form to be able to do that for myself.
The next step is transferring the adjustments back onto a master paper pattern.
Wednesday, November 6, 2013
Trying a new sewing schedule
I was thinking about enhancing the efficiency of my time in the sewing room and came up with a simple schedule. It's based on activities to perform for each day of the week:
Saturdays, Sundays, Mondays: Sewing/Making up my projects
Tuesday and Thursdays: Trace, cut, alter, plan patterns/projects
Wednesdays: Writing and reading sewing blogs, tutorials, forums, books; organize sewing room
Fridays: Finishing projects
It's a very rudimentary system but hopefully it'll keep me focused.
I am taking a pattern drafting course at the local fabric store, we drafted front and back bodices yesterday. The instructor uses Connie Crawford's pattern drafting book, and took my measurements to demonstrate the process for drafting the front. I kept her draft (mine ended up pretty close) and re-drafted another bodice front and back using Helen Armstrong's book.
Armstrong's pattern is on the left, Crawford on the right, drafted by the instructor:
I was quite surprised at the squareness of my front shoulders, there was a very small slope with the Crawford pattern, none at all with Armstrong's instructions.
The Crawford back bodice didn't have a shoulder dart. I need to re-draft that one because the waist measurements do not add up to what it needs to be.
For class next week we're doing a review of drafting the front and back, and then working on a sleeve.
After we have all three patterns we will be sewing the patterns in muslin fabric and adjusting it on my body.
At this point the front and back don't look like it'll come together (look at the shoulder differences!) but we've been assured it'll all work itself out when we pin and fit to the torso.
The Crawford back bodice didn't have a shoulder dart. I need to re-draft that one because the waist measurements do not add up to what it needs to be.
For class next week we're doing a review of drafting the front and back, and then working on a sleeve.
After we have all three patterns we will be sewing the patterns in muslin fabric and adjusting it on my body.
At this point the front and back don't look like it'll come together (look at the shoulder differences!) but we've been assured it'll all work itself out when we pin and fit to the torso.
Sunday, November 3, 2013
Winter 2013 6 PAC
Before 2013 comes to an end, I thought I'd make at least one blog post. I've been busy studying for my CPA exams, my first one is in 17 days! I do try to get some sewing related time in each day, even if it's just to plan or trace patterns.
Speaking of planning, I just finished putting together my first SWAP project. I am participating in the 6 piece winter collection thread over at Stitcher's Guild. Hopefully between the winter holidays, exams, and my fun classes (I finally got into the pointed pen calligraphy class this fall!), this board will become a reality over the next few months.
I'll be making some wearable muslins for the patterns I have not made before, those are the brown and purple fabrics (the purple one is a cotton pique). The rest will be made out of either cotton or wool knits.
The patterns:
Jalie 2795, a hoodie (in the beige sweatshirting)
Jalie 2806, long sleeve t-shirt with a gathered neckline (teal cotton knit)
Kwik Sew 1084, raglan sweater (purple ribbed wool knit)
Vogue 2759, gathered long sleeve top (the same purple wool knit? The wearable muslin will be the black cotton knit)
Kwik Sew 3988 and Silhouette Patterns 3400, yoga pants (brown wool knit)
I'm excited to have some new clothes for my wardrobe. This one is meant to be a pretty casual collection to keep me warm and comfortable during those long study sessions.
Speaking of planning, I just finished putting together my first SWAP project. I am participating in the 6 piece winter collection thread over at Stitcher's Guild. Hopefully between the winter holidays, exams, and my fun classes (I finally got into the pointed pen calligraphy class this fall!), this board will become a reality over the next few months.
I'll be making some wearable muslins for the patterns I have not made before, those are the brown and purple fabrics (the purple one is a cotton pique). The rest will be made out of either cotton or wool knits.
The patterns:
Jalie 2795, a hoodie (in the beige sweatshirting)
Jalie 2806, long sleeve t-shirt with a gathered neckline (teal cotton knit)
Kwik Sew 1084, raglan sweater (purple ribbed wool knit)
Vogue 2759, gathered long sleeve top (the same purple wool knit? The wearable muslin will be the black cotton knit)
Kwik Sew 3988 and Silhouette Patterns 3400, yoga pants (brown wool knit)
I'm excited to have some new clothes for my wardrobe. This one is meant to be a pretty casual collection to keep me warm and comfortable during those long study sessions.
Wednesday, October 31, 2012
Ruby Slip review
I can't believe my last post on here was back in March! With this year quickly coming to a close I'll have to make a goal to share more projects.
I returned back to school this summer to work towards obtaining credits required to sit for the CPA exams. Hopefully by the end of 2013 I will be celebrating the completion of this entire process. Until then, my life revolves around school- which I don't mind at all. Life is relatively simple being a college student.
Speaking of academics, I plan to take as many in-residence couture sewing classes with Susan Khalje as I can next year. They are super pricey but they will be my reward/incentive for getting through the entire CPA certification process. This also means I need to put myself on a strict schedule to get my current sewing skills up to par. I want to go into these classes with a solid hand-sewing and tailoring foundation so that I can build advanced skills during my time with the masters. The first courses begin in September so I have less than a year to practice.. yikes!
In the meantime, here are some pictures and a review for my most recent garment sewing project.
Would you sew it again? Would you recommend it to others?
I returned back to school this summer to work towards obtaining credits required to sit for the CPA exams. Hopefully by the end of 2013 I will be celebrating the completion of this entire process. Until then, my life revolves around school- which I don't mind at all. Life is relatively simple being a college student.
Speaking of academics, I plan to take as many in-residence couture sewing classes with Susan Khalje as I can next year. They are super pricey but they will be my reward/incentive for getting through the entire CPA certification process. This also means I need to put myself on a strict schedule to get my current sewing skills up to par. I want to go into these classes with a solid hand-sewing and tailoring foundation so that I can build advanced skills during my time with the masters. The first courses begin in September so I have less than a year to practice.. yikes!
In the meantime, here are some pictures and a review for my most recent garment sewing project.
Pattern Description:
Slip with bias skirt and lace bodice. You can download the
free pattern and follow the previous sew-along blog entries here:
Pattern Sizing:
8-14
Did it look like the photo/drawing on the pattern
envelope once you were done sewing with it?
Yes!!
Yes!!
Were the instructions easy to follow?
The written instructions along with its photo tutorials were
extremely helpful. This was the first time I have worked with lace and it
definitely helped having the step-by-step support.
What did you particularly like or dislike about the
pattern?
This was a super easy pattern which resulted in a high-end
looking product.
Fabric Used:
Italian silk charmeuse and Swiss-made Venice
lace trim from Fabricmart. I also used a couple of plastic lingerie bra rings
to make the straps adjustable. The lace was a bit stiff to work with and I
don’t know if I would use this particular trim for this sort of application
again. It softened up a little after hand washing and the slight heaviness
helped the bodice maintain its shape.
Pattern alterations or any design changes you
made:
I had a difficult time matching the lace motif at center
front to create a seamless, mirrored look on the lace. I ended up hand
stitching the front two pieces together and clipped through the back layers as
well as I could. I serged the edges on all the lace pieces, top stitching the open
seams to decrease the bulk. I used French seams on the charmeuse and a rolled
hem foot for the bottom edge of the skirt.
I didn’t have the opportunity to fit this slip for my friend
(the pattern was cut based on her measurements) so I wanted to make the straps
adjustable. I used a ready-to-wear slip to figure out how these straps were
attached, the smaller areas were hand stitched in place because there just
isn’t a way to get in there with a sewing machine.
![]() |
| Front view |
![]() |
| Back view |
![]() |
| Lace bodice back |
![]() |
| Lace bodice front |
Would you sew it again? Would you recommend it to others?
I already have some lace and silk set aside for sewing some slips for myself. So yes, I would definitely recommend this pattern to others!
Conclusion:
I made this slip as a bridal shower gift for a dear friend from childhood. I’m thrilled with how it turned out and she was very touched that I gave her a hand-made gift. I included a bottle of Eucalan laundry wash with her package to help care for her new lingerie.
Because this was a gift, I took extra time placing, cutting, and sewing the lace and silk throughout the entire project. I think ambitious beginners can make this pattern if they’re patient with the process. It is a fabulous pattern to make some beautiful lingerie!
Wednesday, March 7, 2012
Fighting against the UFOs
I decided this past weekend I was going to conquer all of my unfinished projects in the sewing room this year. Fortunately I don't have too many and if I can dedicate one Sunday each month I should be able to complete (or finally dump!) these by the beginning of summer.
This past Sunday I worked on a baby quilt my friend Carol had pieced together last summer before I left Korea. I was in charge of quilting, binding, and sending it to baby Andrew (who was born last September). I haven't practiced my free motion techniques in awhile and decided to stitch in the ditch when quilting this blanket.
I am so glad this is finally done. I still need to perfect hand stitching the back of mitered corners, the front looks pretty nice but I can't seem to create the same crisp folds on the other side.
This past Sunday I worked on a baby quilt my friend Carol had pieced together last summer before I left Korea. I was in charge of quilting, binding, and sending it to baby Andrew (who was born last September). I haven't practiced my free motion techniques in awhile and decided to stitch in the ditch when quilting this blanket.
I am so glad this is finally done. I still need to perfect hand stitching the back of mitered corners, the front looks pretty nice but I can't seem to create the same crisp folds on the other side.
![]() |
| Preparing backing, batting, and quilt top |
![]() |
| Stitch in the ditch |
![]() |
| Busy backing fabric helps hide any stitching imperfections |
![]() |
| Off to baby Andrew this will go! |
Saturday, February 25, 2012
A visual how-to for cutting bias binding
I found this technique online at some point, it's definitely not my original idea. I don't remember where it came from, if any of you can help me make the proper attribution please let me know.
I like this method because it doesn't require marking the fabric and I can cut a lot of tape in very little time, especially if I start with a one yard piece of fabric. I've written brief instructions on the pictures. Please let me know if anything needs clarification.
![]() |
| Step 1 |
![]() |
| Step 2 |
![]() |
| Step 3 |
![]() |
| Step 4 |
![]() |
| Step 5 |
![]() |
| Step 6 |
![]() |
| Step 7 |
![]() |
| Step 8 |
Friday, February 10, 2012
Sewing Techniques Sew Along
I'm heading up a Sew Along on Pattern Review where participants will build practice samples of all sorts of sewing techniques. I'll try to take as many pictures as I can to document each process step by step. There are many ways to do the same thing in sewing, I'll be sharing what works for me.
First up...
The BASIC STRAIGHT STITCH
If the ends of my stitches aren't going to be bound within another seam, I like to back stitch the ends to prevent unraveling seams. I like to begin with needle down on my fabric (right sides together). I find this gives me better control of my fabric versus setting the presser feet down before the needle onto the fabric. The distance between where my needle goes in and the edge of the fabric to the right will be your seam allowance. In this sample, I am using a 1/2" seam allowance. There is room between the top edge of the fabric and my needle to run a couple of back stitches before I start forward stitching. Most machines have a manual back stitch lever or even an automatic stitch function, you'll have to read your machine manual to determine the steps for your specific machine.
Continue to keep the right edge of your fabric lined with the markings on the throat plate. I rarely use pins when I sew, I use my entire left hand to guide the top of the fabric and my right fingers are sandwiched between the two layers of fabric. My right thumb is facing upwards (placed under the bottom layer of fabric), my right index finger is right between the two layers, and the rest of the right fingers also face down on top of the first layer of fabric on the machine bed. (This is difficult to capture an image when you're alone, will have DH take a picture when he's around.)
When you reach the bottom edge of the fabric, take a couple more back stitches to secure the end.
Press your stitches with an iron to "set" them. There's some debate as to whether this step is necessary, I do it out of habit.
Open your seam to press it open. This pressing step is vital for professional looking results! Remember pressing is different from ironing. When you press seams, you want to set your hot iron down for a few seconds on an area and then continue that vertical up down movement throughout process. Ironing is continuously moving the iron back and forth over fabric/seam, which could stretch your fabric. Always press. And always know the heat tolerance of your textile. I am using quilting cotton for my samples so the iron is set to "high".
The FLAT FELL SEAM
This is a very sturdy seam that's often found on jeans and sportswear. Men's dress shirts also use this technique. This seam is also called a lap seam. There are sewing machine feet specially made to make these seams, I'll have to show those techniques another time.
With wrong sides together, sew a straight seam. My sample seam allowance is 1/2".
Trim one seam allowance between 1/8" to 1/4" from the seam. This width will depend on your original seam allowance, I took cut mine down to about 1/8".
Fold and press the edge of larger seam allowance up by at least an 1/8". You'll see in the next step you will be top stitching this edge down and the larger the fold the easier it will be to keep it flat. How much you fold up will also determine the width of the final flat fell seam, play around with your samples to determine what you visually like. Open up the seam with the right side facing up and iron down the seam allowance to make it as flat as possible before you take it to the machine.
When you open up the fabric to the right side, you will notice the first line of stitching you made (show on the right). Use your machine feet to help guide your top stitching, keeping as close to the folded edge as possible. I didn't bother switching my machine feet with a smaller left edge one so I am simply using the inner edge of the all purpose foot. Don't forget to back stitch the top and bottom.
Here are some pictures of the flat fell seam from some different perspectives. I have chosen to leave the top stitch open for my sample to see the insides of the seam.
![]() |
| The innards of a flat fell seam |
![]() |
| Top view |
![]() |
| From the inside |
Sunday, December 4, 2011
Pics of Patrones magazines up for sale
I'm in the process of selling these two issues. $20USD/each, excluding shipping. Patterns are still stapled inside the magazines- I had two of each in stash.
Sunday, November 20, 2011
A picture tutorial on making pillow cushion covers with an invisible zipper enclosure
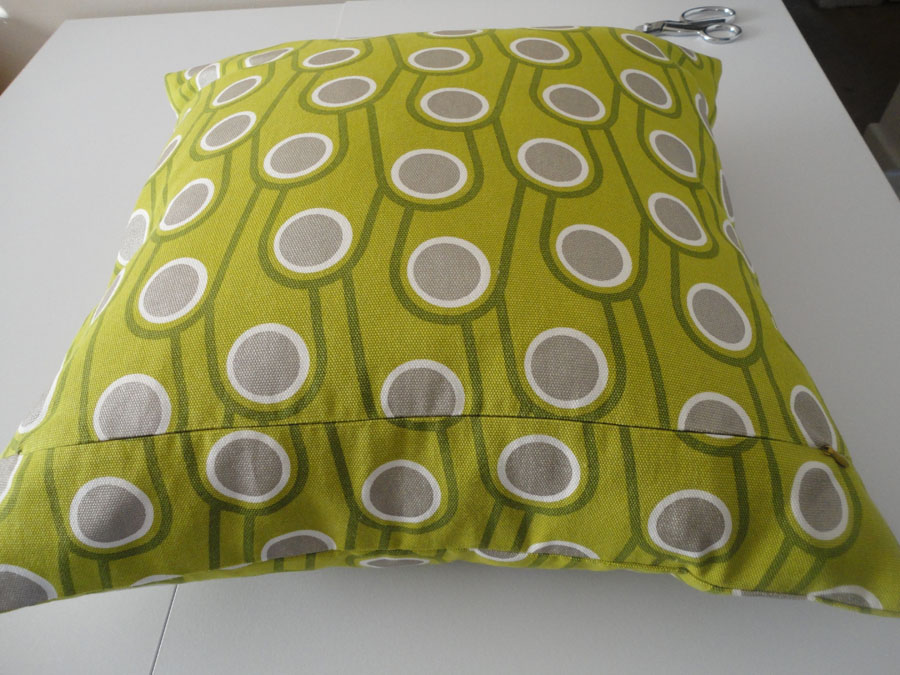
This will be a very image heavy post. On tap for today, a visual guide to sewing your own pillow cushions with an invisible zipper enclosure. I will show you how I drafted a simple pattern, sewn on an invisible zipper, and turned sharp corners using an industrial technique I recently learned.
There will be two styles:
Pillow one has the zipper on the back side and inset a few inches from the top.
Pillow two has the zipper sewn on the side.
Here is a list of sewing notions you may want to have ready:
The usual sewing necessities:
- Fabric for your cushions, the amount you'll need will be dependent on the size of your cushions, and how many you plan to make. I used a 100% cotton canvas from a Dong Dae Mun vendor (2nd floor of building A, I think I have specific stall info if someone is really interested)
- Thread to match your fabric
- Scissors or rotary cutter
- Pins
- Ruler
- Fabric marking tool
- Sewing machine
- Zipper foot for your sewing machine
- Invisible zipper to span the entire width of your pillow
- An iron and ironing board
- Paper to make a pattern template if you desire to make one
Items that aren't essential but made my life easier:
- Serger/overlock machine for cleaning up your raw edges
- Invisible zipper foot for your sewing machine
- Pattern weights
--------------------------------------------
PILLOW TEMPLATE FOR INSET INVISIBLE ZIPPER
My pillow forms are 22" x 22". I drafted my template to result in a finished cushion that measures 20" x 20". I gave myself 1/2" seam allowances all around.
You will have three pattern pieces for the inset style case:
- Front
- Back
- Back inset
The cushion front will be your largest piece, it will be your desired finished size plus seam allowances on all four sides. My piece was 21" x 21".
The back inset's height will depend on how high or low you want your zipper to sit. I modeled my distance after a retail pillow, sitting 3 inches down from the top. My back inset measured 4" x 21", 4" because I still need seam allowances for all four sides including the zipper seam.
The back piece height dimension will be: (height of your front piece minus the height of your inset) plus seam allowances. In my case, (21" - 4") + (1" total seam allowance) = 18". The width will be the same as your front piece. My back was 18" x 21".
If your cushion is not a perfect square, you'll have to play around with the numbers. Here's a visual to break down of how the pieces come together.
To save paper I just marked the cushion back piece dimensions on the cushion front piece and simply folded it over when it was time to cut.
--------------------------------------------
(I didn't take enough pictures during the construction stages of the green pillow so some of these steps will feature the other fabric. Instructions for both pillow styles are 95% the same)
CUTTING OUT YOUR FABRIC
I chose to lay out my pattern with the grain going vertically (up/down) along my pillow case. The way I wanted my fabric design dictated this layout. I don't think it's really important for you to pay attention to grain lines with pillow cases as long as you're consistent.
I love using pattern weights when I am cutting out fabric.
![]() |
![]() |
SEWING YOUR CUSHIONS
If you are choosing to serge your raw edges you will want to serge the bottom edge of your back inset piece, and the top edge of the back piece.
With right sides facing each other, mark how long you want a closed seam. There will be two closed seams, one on each side of your cushion. I marked mine 3" from the raw edge, giving me a 2.5" closed seam.
Sew to the marking, be sure to remember to make a couple of back stitches to secure the seam.
Open your seam and iron the seam allowance. This step is not a complete necessity but I found pre-setting my seams really helped keep things crisp and easy to see as the sewing process continued.
SEWING THE INVISIBLE ZIPPER
Prepare the invisible zipper by ironing the coils open. In the first picture the point of my iron isn't placed properly to show you how the coils need to be prepped. The point of your iron should be used to gently pry the coil flat.
Place your zipper on the seam allowance, slider down on the fabric and zipper pulled open. Line one edge of the zipper flush with the fabric. It doesn't matter which end you use, the important thing here is to have a zipper that's the same length or longer than the width of your cushion. If you need it, pin the top of the zipper to hold it still.
When you start to sew the zipper down, make sure you are only sewing on the seam allowance, fold the inset or back piece to the other side. You will want to start sewing the zipper higher than where you stopped the closed seam. For a less bulkier side seam, I chose to leave the first inch of the top and bottom of the zipper free, so I started sewing about an inch in from the side seam (stop the same distance on the other end).
Having an invisible zipper foot really helps the needle get right near the coils. You can sew invisible zippers with a regular zipper foot too, this is where ironing the coils flat will help getting the foot close to the edge of the coil. Proprietary plastic zipper feet are sold at places like JoAnn and Hancock Fabrics, I prefer the ones made by YKK over Coats and Clark. Or, check out Ebay and other online sources for metal invisible zipper feet that will fit your machine.
Use your hands to guide the zipper tape to match the sides of your raw (or serged) edge. After sewing many zippers I don't usually use pins or tape anymore, you do what you need to make this all work.
When you are done with the first side of the zipper, zip up the tape completely. On each end of your zipper, marks where each side of zipper tape will align with each other. This is done to avoid making any bumps in the fabric when zippers aren't matched up properly. Doing this step really helps me avoid using pins to hold my zipper tape to the fabric. As long as I make sure the lines are in the same place on both ends as I sew, I know the zipper is going to be lined up perfectly when I'm done.
Open the zipper tape up and sew in the same direction as you did with the first side. Make sure you begin and end the same distance from your raw edges as before, and the markings from the previous step are all aligned. Use your hands to guide the edge of the zipper tape with the edge of your seam allowance on side two. Don't forget to fold your back inset or back piece to the other side so you are only sewing the tape to one layer (the seam allowance)
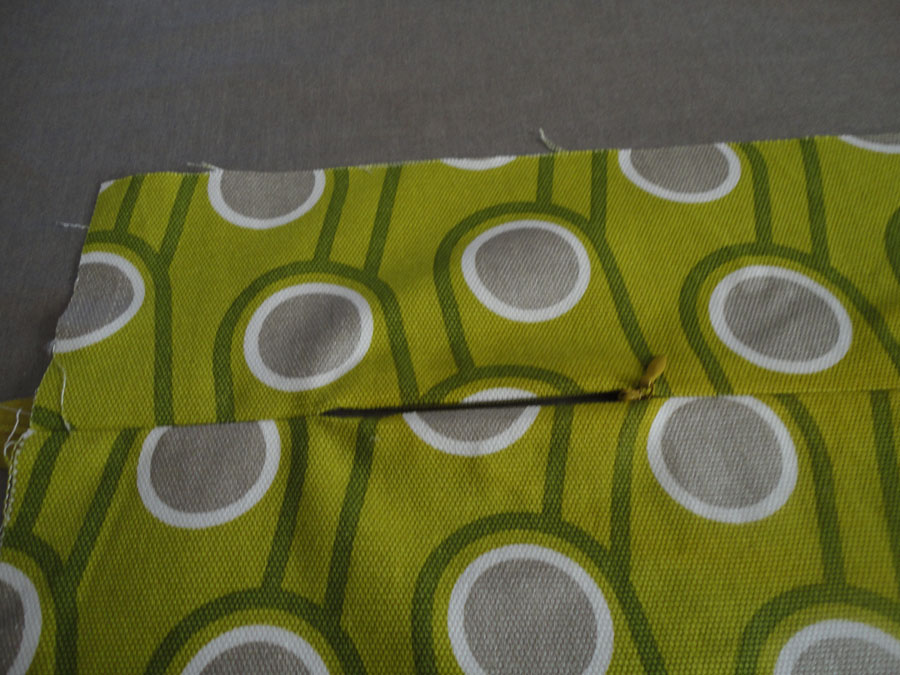
Once both sides are sewn in, take your piece and iron the right side of the fabric. You will want to open the zipper up to make sure there is room to turn the cushion inside out when the other three seams are sewn together. Not leaving the zipper open will make it trickier to open later. Be gentle when you have to maneuver the zipper tab past the couple inches of closed seams, if you're too forceful it may break open the stitches. You can see how the closed seams now act as a stopper for the zipper on both sides.
Cut the zipper tape if it's longer than the pillow. This is where stopping the sewing line an inch from the side is helpful. You can cut your zipper tape right at the stitching line for the side seams so it won't get sewn down.
FINISHING STEPS
Take your completed back piece and line it right sides together with the front piece.
Sew up the remaining three sides. Instead of pivoting at the corner, sew all the way to the edge (don't forget to backstitch).
I find it helpful to iron open each seam right after I sew them. I like having neat and crisp edges when I iron the cushion sides after it's all turned inside out. You can skip this part if you want, I'm neurotic.
After you sew the sides you can follow up with a serger. You could also skip the sewing part and just serge straight off the bat to close the seams.
TURNING SHARP CORNERS
I have been looking for methods on turning sharp corners for the longest time. I have used numerous techniques with a success rate of less than 25% in achieving the kind of pointy corners you see in ready to wear collars.
Recently I saw a tip in Threads magazine from Peggy Sagers on the industry technique for turning corners. I followed the simple rules on this heavier weight fabric and I was so happy with the results. I am now in the 85% success bracket, with more practice I am sure I can hit over 90%. This might be hard to describe using simply pictures and words but I will try my best. I tried taking a video of the process but I had no one else to hold the camera- it didn't turn out too well.
I chose to iron after each folding process because my fabric is pretty thick. You can play around with ironing or not ironing. Like I said, I'm crazy about having tidy corners and seams.
Fold the corner up so the intersection of the two stitched side seams meet at the bottom center of the triangle.
Fold one side seam on the stitching line and iron (it doesn't matter which side you do first). Repeat on the other side.
When the side seams are folded and held down, we will essentially have a mitered corner. Reach through the zipper opening into the cushion and stick your index finger or thumb (depending on which hand you use to do the turning) as close into the corner as you can. Use your thumb (index finger) to hold down the folds on the outside.
In the above picture I used my left hand to turn the corners, in the next photo I did the step with my right hand. See what I mean when I warned you I took pictures during construction of multiple pillows?
We are continuing the visual instructions using my right hand to turn the corners (as seen above). The rest of the cushion fabric will be gathered between the c-shape you'll be making with your thumb and index finger.
Start to turn the corner to the outside while you still hold down the folded corner.
You can the point on its way out....
Here is the fully turned out corner!
This particular corner isn't fully straight just yet but I hit it with an iron and a little shuffling around of fabric and it ended up looking pretty nicely.
Do this for the remaining three corners and you're ready to stuff your pillow form into the cushion.
Zip the suckers up and you've got yourself a very professional looking cushion cover.
--------------------------------------------
INSTRUCTIONS FOR A CUSHION WITH A SIDE INVISIBLE ZIPPER
Cut two uniform pieces of fabric that includes seam allowances for all four sides. Insert the zipper using the method I detailed above to one side of each fabric piece. Sew up the remaining three side seams and turn the corners in the same manner. Stuff your pillow case into your finished masterpiece.
Who needs to pay beaucoups bucks for customized pillow cushions? This is a fun and fast project with beautiful results.
I hope my tutorial has been helpful! I have been helped by many online photo tutorials over the years and I'm happy to finally be able to give back!
The final parting shot... I added some decorations to my straight stitch machine the other day.

Subscribe to:
Posts (Atom)